|
1. Preamble
DISCLAIMER: Because Modding this game is not supported on a technical level, you will be continually overwriting and backing up files. You are modding this game at your own risk. I will take no responsibility if what you do
to your game corrupts it or becomes unplayable. However you can always uninstall and reinstall the game to get it back to 'default'. I highly recommend backing up all savegames before you start modding (instructions on
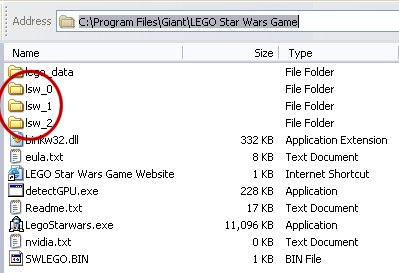
this to follow) as uninstalling the game will delete all your savegames. 2. Backing up Savegames The default location for LEGO Star Wars is
Use "My Computer" to view the
C:\Program Files\Giant\LEGO Star Wars Game\
directory. If you installed it elsewhere, under a
\games\
subdirectory for example, that's fine, just find where you put it.
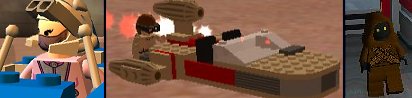
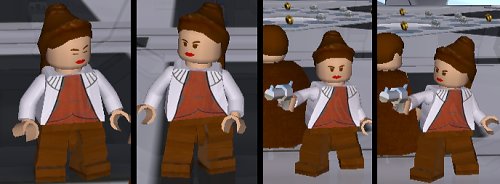
5. Understanding Limitations Unfortunately at this stage there are some quite big limitations with what can be done, depending on the whim of the programmer who made the UVmaps for the skin wraps over the models. For example the Leia below should have brown arms, but the skinmap uses the same colour block for the torso base and the arms, sadly, and that's the only model with suitable hair to reskin the Padme model to Bespin Leia. Still, plenty of scope to get reasonably close approximations of existing official minifigs, and of course endless possibilities to make custom minifigs all the while working within the limitations of the skin meshes & UVmaps.
Now that permission has been given by the publishers to mod the game there's a slim chance we may be able to get some generic models from the devs to reskin that don't have 'optimised' UVmaps and will allow different coloured
torsos, arms, hands, hair, heads, legs, hips. I will work on that soon, but I don't want to annoy the devs too much who are rumoured to be hard at work on an Episode 4-6 LEGO Star Wars game. 6. Decide what you intend to create
A very important step this. There's not much point in aimlessly mucking around with a skin hoping that you'll miraculously end up with some amazing new character. While that may work on rare occasions, the best results will
come about if you have some sort of idea to begin with. The best way to start is to familiarise yourself with all the models in-game so you can get an understanding of what the limits are. There's no point wanting to make
a female skin with long hair and a red arms, white torso and blue legs, when there are no models in game with that hair type that allow different coloured torso / arms / legs. 7. Extracting the .DDS texture file(s) from the .hgp archive
Now to actually do something! If you've installed
perl correctly you'll now be able to run perl scripts from the command prompt.
IMPORTANT
. Your reskinned character will overwrite the existing stormtrooper file. So we need to back up the existing
stormTrooper.hgp
file so we can restore it later. I will try and figure out a script a script that does this automatically soon, but for now we have to do it the old way;
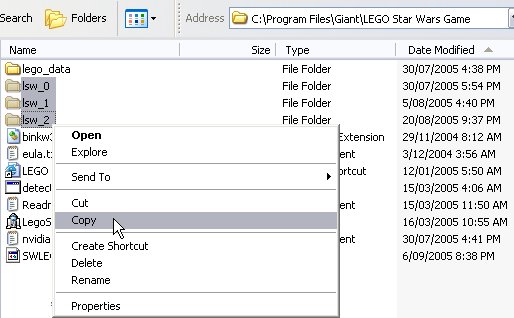
Copy and paste stormTrooper.hgp from \Chars\Clone\ to
Now we can restore the original version from this backup directory if necessary at a later date.
Click 'start' in your windows taskbar. Click 'Run...'
Be sure to use the correct capitalisation, this procedure is case-sensitive. Once you hit ENTER, if all went well several new .DDS files will appear your windows default directory and a new text file stormTrooper.hgp.TXT should appear in C:\lswmods\ . The place where your .DDS files should now be is;
Though if you log in to your PC or it has several users, you may not have an
\Owner\
subdirectory off
\Documents and Settings\
You should be able to locate two .DDS files; 77824.DDS & 165376.DDS Cut and paste 77824.DDS & 165376.DDS to
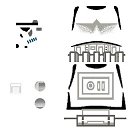
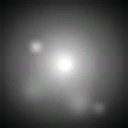
If you now open up these two images in Paint Shop Pro or Photoshop, you should see these ( Fig 7i. , Fig 7ii. ) - (remember to answer "no" if a box prompts whether or not to display MIPmaps):
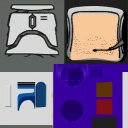
Notice that 165376.DDS is just a white blur ( Fig 7ii. ). These are often used as effects (in this case I assume it's a reflection effect on the helmet eyes or something). You generally need not worry about these files - it's pretty obvious which ones relate to the skin of the model ( 77824.DDS ), though some models (especially ones that were not used in the final game) can have more than one .DDS file that are extracted and need edited for the re-skin, it's just that in the optimised models like the stormtrooper above, all the various parts have (usually) been consolidated into one large dds file. Obviously we only need concern ourselves with 77824.DDS from this point forward. When you are going to re-skin a character with a human face, often there won't be any mouth (and sometimes eyes) on the face area ( Fig 7iii. ). This is normal, don't go adding your own face features in, as the face features for that character will be added in and animated by the game itself.
|
|||||||||||||||||||||||||
| |